Did you know that you can create different buttercream icing borders with just one icing tip?
You actually don’t need to spend a lot of money buying numerous icing tips especially if you are still starting to learn how to decorate a cake. You can just acquire one icing tip and master all the border designs that you can create from it before purchasing an additional tip.


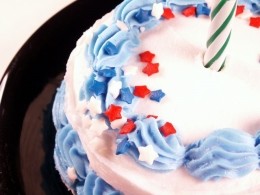
The star tip #17 is the only icing tip you’ll need to create 10 different icing borders. The most basic border that you can create using the #17 tip is the shell border. Learn how to make the other 9 borders for more cake decorating options:
Reverse shell – It is actually the same with the basic shell. The only different is that you start piping a bit to the right then to the left instead of in a straight line.
Puff garland – Move the star tip #17 in a zigzagging motion. Start with little pressure on the pastry bag at the beginning while gradually increasing as you move to the center and ease off towards the end.
Rope border – Start by making a backwards S and overlap another backwards S right where the first one curves. Do this repeatedly to create a rope-like appearance.
Scroll border – On one of the cake’s side center, squeeze the pastry bag really hard then ease off gently towards the edge. Do this on the other side as well.
Zigzag border – To make this type of border, apply even pressure while doing a zigzagging motion.
Garland border – Do a zigzagging motion while moving the pastry bag up and down. You can do this border for the top or the side of the cake.
Rosette border- Make the rosettes by creating small icing circles. Ensure that you start the circle from the outside and end in the circle.
Corkscrew border- This border can be done by making multiple small letter “E’s” that are continuous and very close together.
Swirl border – Create continuous swirls, taking care to leave the center part open. Take a contrasting colored icing and put a small dot on the swirl’s center.